December 22, 2021
Create your own .NET Core CLI tool
In this tutorial, we will know how to develop a .NET Command Line Interface (CLI) Tool using the new .NET 6 technology and build your own global tools to make your work easier.
Source
Built with
- .NET 6 Console App
- DotNet Tool & nupkg
Prerequisites
- Make sure you are running on the latest .NET 6 SDK (SDK 6.0 and above only).
- Visual Studio 2022 or Rider 2021.3.1
Create your own CLI
On this example, we will create an .NET Core CLI tool use to check current weather data for a given city, you may need to register OpenWeatherMap's API.
Then run this command to create .NET Core Console app in your computer
1dotnet new console Weather.Cli
After it's done, let create a Weather Service class, the purpose of this class is to fetch the weather data from API.
WeatherService.cs1 2 3 4 5 6 7 8 9 10 11 12 13 14 15 16 17 18 19 20 21 22 23 24 25 26 27 28 29 30 31 32 33 34 35 36 37 38 39 40 41 42 43 44 45 46 47 48 49public static class WeatherService { const string API_KEY = "YOUR_API_KEY"; public static async Task Run(string[] args) { var httpClient = new HttpClient() { BaseAddress = new Uri("https://api.openweathermap.org/") }; var continuesCheck = true; do { var city = args.AsQueryable().FirstOrDefault(); if (city == null) { Console.Write("Enter the city: "); city = Console.ReadLine()!.Trim(); } var response = await httpClient.GetAsync($"data/2.5/weather?q={city}&appid={API_KEY}&units=metric"); if (response.StatusCode == HttpStatusCode.NotFound) { Console.WriteLine($"Weather not found for this city: {city}"); continue; } var currentWeather = await response.Content.ReadFromJsonAsync<WeatherObject>(); Console.WriteLine($"Current weather for city: {city}"); if (currentWeather != null) { Console.WriteLine($"City: {currentWeather.Name}"); Console.WriteLine($"Country: {currentWeather.Sys?.Country}"); Console.WriteLine($"Weather: {currentWeather.Weather![0].Description}"); Console.WriteLine($"Temperature: {currentWeather.Main!.Temp}°C"); Console.WriteLine($"Humidity: {currentWeather.Main!.Humidity}%"); Console.WriteLine($"Pressure: {currentWeather.Main!.Pressure}hPa"); Console.WriteLine($"Wind: {currentWeather.Wind!.Speed}m/s, {currentWeather!.Wind!.Deg}°"); Console.WriteLine($"Clouds: {currentWeather.Clouds!.All}%"); } Console.WriteLine($"Continues to check the weather for another city? (Y/N)"); if (Console.ReadLine()!.Trim() != "Y") continuesCheck = false; } while (continuesCheck); } }
Let make sure you can build and run the project,
Then we can able to config this console app as the nupkg tool by adding more these lines to Weather.Cli.csproj file.
Weather.Cli.csproj1 2 3<PackAsTool>true</PackAsTool> <ToolCommandName>weather</ToolCommandName> <PackageOutputPath>./nupkg</PackageOutputPath>
With this <ToolCommandName>weather</ToolCommandName>, we configured the CLI will be execute by typing weather in the command line.
Build the nupkg
1dotnet pack
then install this nupkg as global tools with the local ./nupkg source by using this command line
1dotnet tool install --global -add-source ./nupkg weather.cli
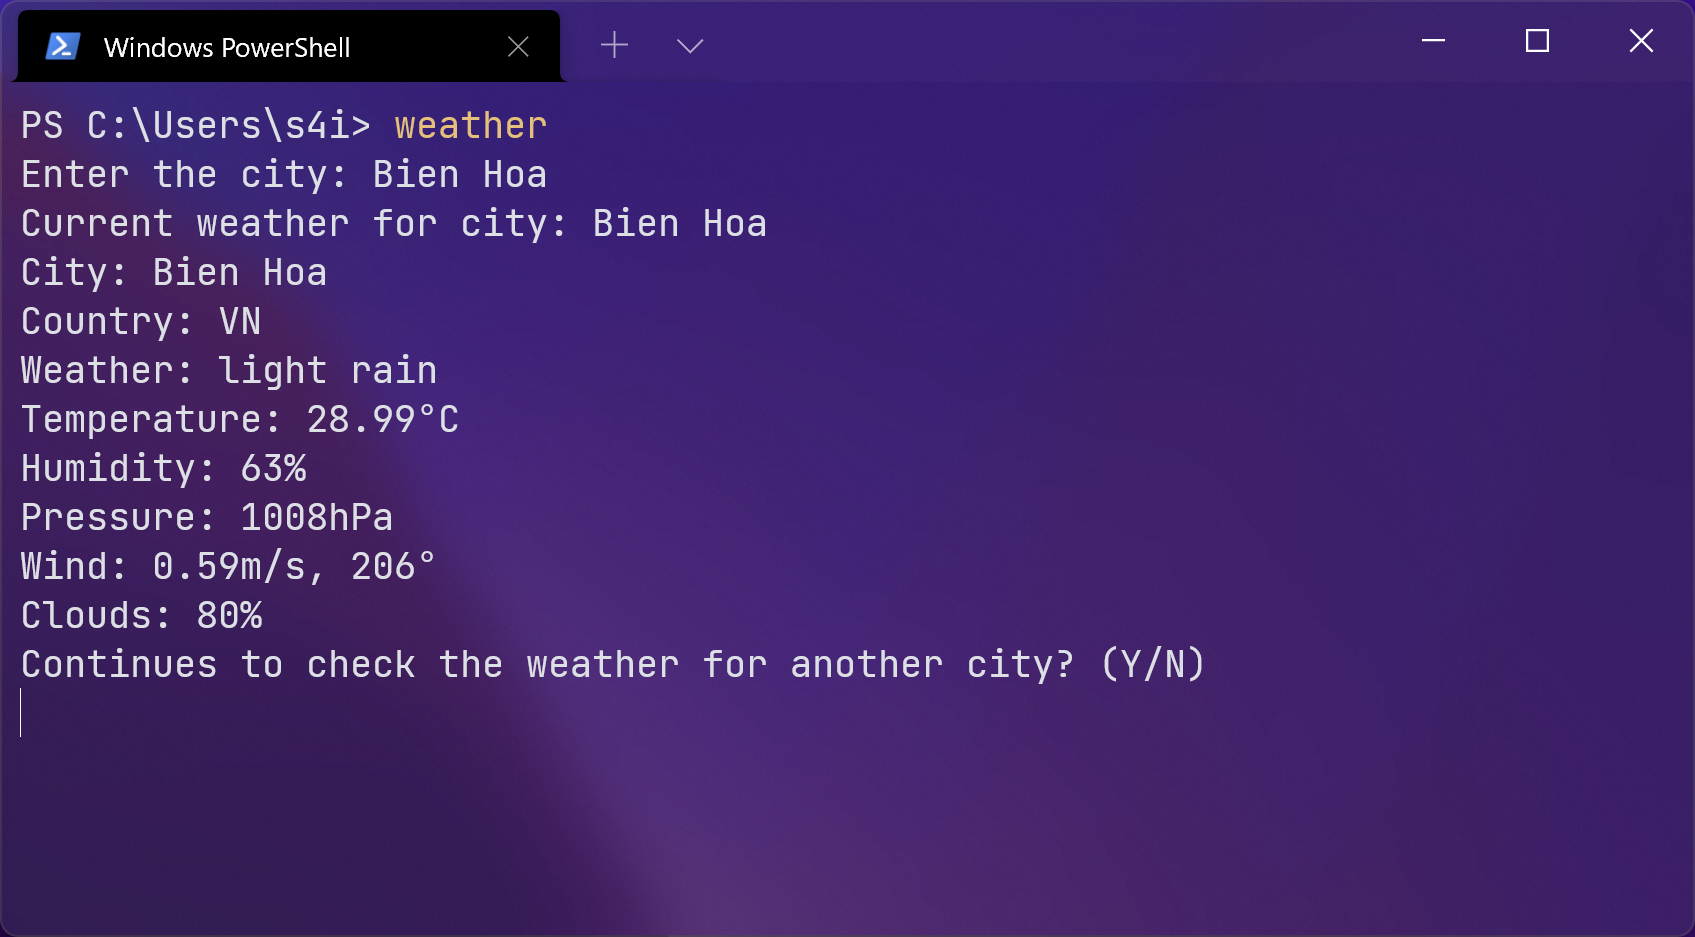
Finally, we can execute this CLI tool anywhere by enter weather in command line
You can read about .NET tool creation in the official documentation here
That's it for now. Keep coding and enjoy exploring !!!


I’m glad you’re here. I like the simple so I created this minimalist site to share what I’ve learned interesting during my journey in technologies and in life. Keep coding and enjoy exploring !!!

